Tie Dye ~ part 2

As promised here are the finished things and the kids are really proud of them! Seriously, this photo above just make me smile so wide. I might even have to start dressing them in similar clothes more often....

This was a size s women's t-shirt that is now a perfect summer's dress for the 4 yr old. We did nothing other than tie dye it, and it fits her perfectly.

This is the 7yr old's concentric circles shirt. The sleeves were folded concertina-style.

I also got carried away by the huge barrel of indigo dye sitting outside so today I dyed a white shirt that, being the parent that I am, I should not own. Spaghetti bolognese seems to find its way on it even when we have a bbq for dinner.

So it is now a lovely blue! This has been 'dipped' about 4 times. Yesterday the kids were so eager to see their finished projects that they didn't want to dip the clothes into the dye more than once. I have a little (but only a little) more patience, and waited 20 mins between dippings to get a deeper color and a more even finish. If you are dyeing something you actually want to look nice, I recommend dipping the clothing into the dye at least 4 times.

I LOVE how the white buttons really stand out now.
SHARE:

Tie Dye ~ part 1

I have been wanting to tie dye for ages and finally yesterday we got started on it. I bought this kit on sale for only a couple of dollars.

The instruction manual has lots of information about where indigo dye comes from and what it is used for, so it was great for the kids (and by kids, I also mean, me) to learn something new.

In goes the indigo dye.

The 7yr old stirs. If ever there was a kid who would fall head first into a barrel of indigo dye it would be the 4yr old. And I'm not even joking.

Then we had to dissolve the reducing agent in 2 cups of hot water.

It was stirred until dissolved.

Then poured into the dye solution.

The 7yr old loved stirring and was very content just sitting there (while I firmly held the apron strings of the 4yr old to stop her leaning too far forward...)

Whilst the dye was proving, or whatever the correct word may be, we chose some designs and put rubber bands around an assortment of white clothing. All the clothes we used for this project were pre-loved.

The 7yr old learnt about concentric circles.

And some of us tried to get all fancy.


When the dye was ready, we had to drench the clothes completely before squeezing out the water and air and immersing them into the dye. The clothes turn a kind of green until you bring them out of the dye and oxygen makes them turn blue! We were fascinated! I think this must be science at its best.

We had an old plastic sheet to lay the dripping clothes out onto. This makes a lot of mess so I recommend only doing this outside, wearing old clothes, aprons and rubber gloves.

I will show you the finished photos tomorrow!

I have shared this at NutureStore. Please click their link to find more creative ideas.
SHARE:

July 4th dress

My 4yr old is a proud American but I think that's mostly because she really just likes being different from the rest of us (and she likes singing/shouting all those patriotic songs I don't know any of the words to). Anyway, she requested a stars and stripes dress to wear for July 4th and I wanted to share with you what I came up with.

I didn't use a pattern but started with a basic bodice and skirt shape which came together really nicely.

I started by shirring a bodice piece, which is a very simple technique yet oh so effective. Look it up if you have never tried it ~ there are plenty of tutorials online.

I just serged some basic armhole shapes not really knowing if the stitches would hold the elastic, but it worked out perfectly.

I also put in an elasticated band along the top piece of the bodice. This isn't necessary, but the fabric will ruffle outwards at the top if you don't do this. Some people like that look, but I prefer the fabric to sit flat against the body.

Next, I made some bias tape and stitched it to the armholes keeping the ends longs so that they can be used as ties.
I then cut some rectangle shapes for the skirt which I cut longer than the length of the bodice and gathered it before sewing it to the bottom of the bodice.
Finally I put a bit more bias tape along the bottom, mainly to save myself having to hem the thing (I still haven't come across a fool-proof hemming technique ~ can anyone help me?)
And there it is! I think I'll have to make a Union Jack one next, just to even things out a bit.


SHARE:

July 4 decorations

I am starting to do a bit of work with a salon here in Huntington Beach called Studio 37 Salon. If you are a local you really must go and check them out. The girls are super friendly and really good at their jobs which always makes for a successful haircut experience. Plus Deanna, the owner, is a great supporter of Handmade and I was so happy when she asked me to make some unique 4th of July decorations for her.

We got completely inspired by these red, white and blue bandannas.

And with a bit of maths (which took me to about my limit) I made a bunting to fit along the front of the shopfront. I put grommets into the fabric at certain points so that it could be attached easily.


I also made a vase of pinwheels with sparkly card and used star and heart buttons for the centers. I attached them to skewers and put them in a large hurricane vase with some florists' foam at the bottom to keep them in position. I then threw in a good amount of red feathers to cover the foam.


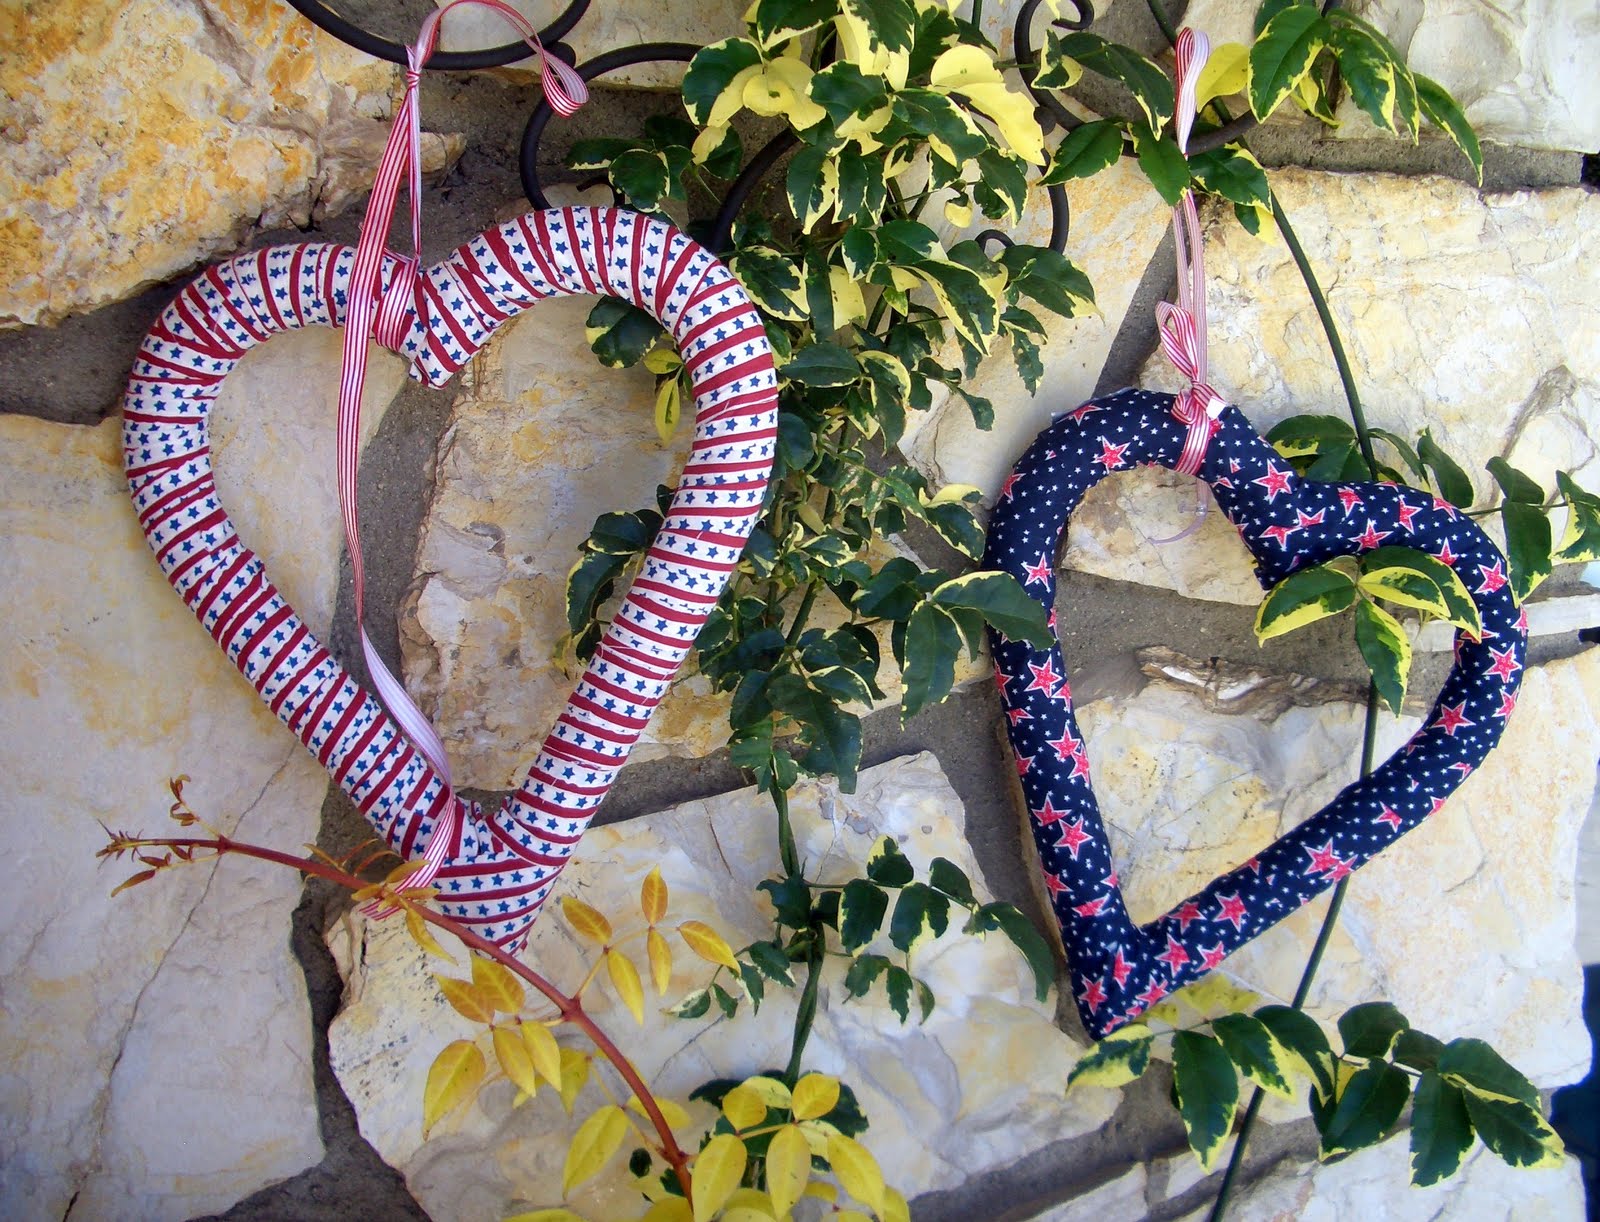
Outside we hung some stars and stripes covered hearts to the wall with ribbon.

Happy 4th of July to my American friends!
SHARE:

Felt flower cushion tutorial

Here is my entry ~ the final tutorial in our Make It Easy (Etsy Educationals) series. This is the last one of the series and I really hope you have enjoyed them. For a recap on the participants and their blogs please click on the names below. You can also purchase the beautiful ebook from today, which features all 11 tutorials from our series complete with instructions and photos.

make it easy
Hollybobbred tedlittle green bumsfuegohello beautifulcarla sonheimstacey winterssara nicolebtrthoney's quillingflex family


Felt Flower cushion tutorial

Step 1
Cut your fabric for the cushion cover. My pillow form measures 16 x 16 inches. Please adjust measurements if you have a different size. Cut 1 piece of fabric 17 x 17 inches (the height and width of your pillow form plus 1 inch). Cut a second piece of fabric 17 x 9 inches (the length of your pillow form and approximately half the height). Cut a final piece of fabric measuring 17 x 12 inches (the length of your pillow form and approximately ¾ the height).

Step 2
Create a 2 1/2 inch diameter circle template from cardstock and use the template to cut circles from your wool felt. I needed about 80 circles to complete my flower. You will need to cut all your circles in half.

Step 3
Lay out your 17 x 17 inch piece of fabric and start to pin the first round of petals evenly. It helps if you find the center lines by folding the fabric in half both ways, pin the top/bottom/left and right petals first, then continue by filling in the gaps in between. Leave a 1 inch gap between the top, bottom and side petals and the edge of the fabric. Sew on the petals in continuous circle.

Step 4
Build up the next layer of petals by off-setting them against the previous layer. Sew one round at a time, carefully pinning first, to ensure accurate positioning.


Marvel at your growing flower as you continue in this way until you get close to the center.
For the last few rounds I used smaller circles (1 1/2 inch diameter) to fit in the final spaces.


Step 5
I finished my design with a pretty spiral flower center, though you could use a decorative button or crochet flower. To make the flower center I used, take one of the large felt circles and starting on the outside edge, cut a spiral all the way into the center.

Start to roll the spiral together (I used a hot glue gun along the edge of my spiral as I rolled it. This is essential to keep the spiral together – especially if you want your cushion to be functional as well as beautiful).

Fold the center part of the spiral onto the bottom of your flower and glue. I used the hot glue to then stick the flower into the center of my cushion.

Step 6
Now that your design is complete, it is time to finish the cushion cover. Take your two remaining pieces of fabric and hem along one long edge on both pieces. With right sides together, lay the smaller of the two pieces onto your cushion front and pin.

Next, lay the larger piece (right sides together) over the cushion front and pin.

Finally, sew all around your cushion. Turn the right way, slip over your pillow form and admire your lovely work.


SHARE:
© The Hello Beautiful Blog | All rights reserved.
Blogger Template Created by pipdig