LBD DIY
Everyone needs a little black dress, right? For this one, I used the Pussy Bow Dress by Salme Patterns. I am a huge fan of Salme Patterns. There's just something about them that fits my body so well. Maybe it's the elasticated waist?!!?! And they have a new pattern out - Paper Bag Waist shorts. I have a serious crush on those, in black with little white polkadots.
I lined this dress, which though not in the directions, is easier than you think and gives the dress a really really nice finish. It makes it feel great to wear.
And something I discovered in making this dress; black is not an easy color to photograph.
You can go over and read all about how to add a lining to this dress at Fiskars.
Love letters to lampshade
When I say love letters, I actually just mean the envelopes, stamps, postmarks and addresses. And these were the ones my husband (then boyfriend) wrote to me. I don't really fancy delving into the letters I wrote to him during years of missing him whilst traveling and living in different countries. I actually shudder to think about what I may have written to him. My teenage self is quite different to my adult self (and I'm hoping I'm not the first person to have ever said that).
And besides, my husband was the best letter writer ever. He liked to doodle all over the envelopes and made envelopes and collages out of old magazine pages, cool pictures and comic strips. Over a decade later, these envelopes are pretty special to me and I used them to make a large scale fabric collage which I had printed by Spoonflower.
You can go over to the Spoonflower blog post and read all about my process of making a picture collage like this and also how to actually cover a lampshade with it.
I LOVE my new lampshade and I should probably thank my husband for his contribution.
Indulgent sewing
I really love the various jobs I have, making things, I really do. But I can't remember the last time I sewed something that wasn't for work. When I'm writing up a project, and especially when it comes to photographing it along the way, things can get serious. I have to clear my table and make it look like everything is clean and pristine so that the photos look good. I have to make sure there's great lighting or that my studio lights are well-positioned. I also have to make sure my sewing is neat and straight (which it mostly is, but hey, scrutinize most of my projects and you'll find a fault somewhere) in case people spot shoddy workmanship in the photographs. As well as making sure the project turns out well, it's also stressful trying to make the write-up look and sound good too. I'm not complaining. I am thriving off it all and having fun along the way. But last night, after a couple of days of feeling unwell, I just wanted some indulgent sewing. To make something just for the pure pleasure of sewing. To be able to make a mess on my cutting table and not have to clear it away. To not even have to get my camera out to record each step of the process. It was simple and easy and quick. A breath of fresh air that I hadn't realized I needed.
I didn't even make anything for me. Often it doesn't really matter what the finished thing is that I make. I just really enjoy the process. Selecting a pattern, choosing the fabric, cutting, pinning, sewing....With music on in the background, I can just keep going, lost in the process. Sometimes I feel sad when I finish a project because my moment of 'being in the moment' has come to an end. Do you feel like that ever?
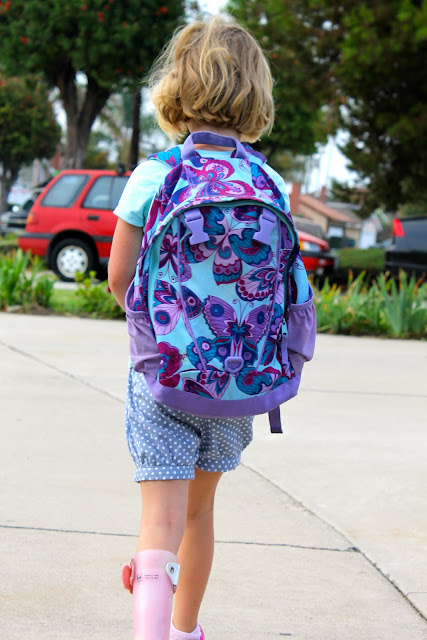
I made up a second pair of Summer Place Shorts by Maw Bell Designs for my daughter. The first pair I made a while back was for Rachael's Shorts on the Line series she hosted over the summer and I loved the pattern the first time around and really wanted to make a second pair in cotton. I used Robert Kaufman Everything Nice in Grey and they are a hit. Fresh off the machine last night, my daughter wanted to wear them to school today, so here are a few photos of our blissful morning walk to school earlier. And ahhh.....I'm feeling better already.
New Placemats thanks to Spoonflower
You can find me over at the Spoonflower blog again today, with a post on how to recover an old set of cork-backed placemats for the table. I had an old set of placemats that I was reluctant to let go of, (they were a wedding present) but they had seen WAY better days, for sure. The original image on the placemats were of tulips, which was the flower that we used to decorate the hall where we had our reception (thanks to my mother-in-law for cleverly growing them right on time!), so they were kind of special/sentimental.
I was pretty reluctant to start on this project as I was really worried it would be a total failure. I thought they'd end up looking so homemade and a bit pathetic. I thought I'd ruin the original placemats (even though they were pretty much in a state of disrepair) and that I'd end up having to throw them out (which would have made me sad).
BUT, they are lovely!! I'm so surprised at how well they came out and even my husband is impressed. He's very supportive and wonderful about what I do, but he's also honest. He'll tell me if something's not right, which I appreciate about him. I used a photo I took of a Calla Lily which was the flower in my wedding bouquet - so the placemats still have a wedding-related theme to me.
I think the biggest tip I can give you about making these yourself, is to make sure you finish the edges with a marker or permanent ink pad. I used black because that's what they'd used on the original placemats, but you could use any color. It just gives such a nice finish to the edge and really blends in the edge of the fabric with the edge of the mat.
You can go and read the full tutorial by clicking here.
| There were 6 of them. These are the better looking originals. I was too embarrassed to show anyone the worst ones. |
| The finished placemats. Ahhh, I'm happy to show off the whole pretty set now! |
I think the biggest tip I can give you about making these yourself, is to make sure you finish the edges with a marker or permanent ink pad. I used black because that's what they'd used on the original placemats, but you could use any color. It just gives such a nice finish to the edge and really blends in the edge of the fabric with the edge of the mat.
You can go and read the full tutorial by clicking here.
New Year's Resolution - September
Ok, so I have to tell you guys that I really, really love this top! Some of my new year's resolution sewing has been great and some of them...well....mediocre, I'll admit. But this one - I love!! I used the Wiksten Tova pattern that is available as a pdf download here for $10.
I've talked before about how much I love pdf patterns that you print at home, so you don't need me to bore you with that again. Just know that they suit my impatient personality... If you are interested in downloadable patterns, my advice to you it to invest in a great paper cutter. It will make putting your pattern together a breeze. Enjoyable even!
You can go and read all about my September project over on the Fiskars website by clicking here.
#sp
Subscribe to:
Posts (Atom)
©
The Hello Beautiful Blog | All rights reserved.


