New year's resolution - May hoodie


Do you remember my new year's resolution to sew myself one item of clothing each month of 2012. I'm doing well so far and in fact, I'm probably ahead of schedule. My May project is now up over at the Fiskar's website - I made a hoodie from a pattern that I drafted myself by tracing off another top I have. I'd never really tried that before on clothing for me (I've done it a few times for children's clothes but they are easy because they are so small!) I used a sweatshirt that I have that fits me well, and paying attention to the seam lines and adding in enough seam allowance, it was pretty straightforward. I traced the pattern onto freezer paper, but you could also use Swedish tracing paper or even better, that brown paper that comes in all the packing boxes.


Click here to go and read all about the project over at Fiskars.

Have you ever traced off a pattern? Did you find it a successful experience? I actually REALLY liked creating this hoodie this way. Because I didn't have any instructions or pattern directions to follow, it felt WAY more creative than usual and I felt more confident in allowing my own sense of style to emerge.


SHARE:

Father's day card and Fiskars

Here in the US we celebrated Mother's Day this past weekend but did you know that Father's Day is just around the corner - June 17 and it's never too soon to start planning ways to celebrate the amazing fathers in your life. I have a new tutorial up over at the Fiskar's website for creating your own photobooth props and taking some cool little photos to make a fun Father's Day card. Click here to read all about it.

And while I'm here - have you heard that there's some mysterious things going on over at Fiskateers.com - the Fiskar's online community and social networking site for crafters of all kinds? Click here and here for some exciting peeks....
SHARE:

Finished chiffon blouse

As I said before, I made this using the burdastyle magazine Button-down blouse which is completely easy and straightforward and would probably have only taken an hour or so to sew up, had I not been using this no-rush chiffon. I shared some of the methods I picked up along the way, for cutting and sewing the chiffon which you can find here, here and here.
I look like I've just seen something nasty on the ground, but it's just one of the stupid faces I make when I'm having my picture taken.
In all, working with the chiffon was a pleasant experience and not the nightmare I had anticipated. Using the cutting and sewing techniques I learned really helped and I don't think the project would have been possible without them. I realized straight away that this was a project that simply could not be rushed; there is just no way you can manipulate the chiffon to do anything it doesn't want to do. You need to cajole it, stroke its ego and if you're lucky it can be persuaded to co-operate. It's a precious thing, this chiffon (a bit like the rose in the Little Prince by Saint Exupery - if anyone knows what I'm talking about?)
My 7 year old took these photos for me. He told me the blouse looked really nice but that it will look even better when I finish the inside and it's not sew-through anymore. I totally imagined him going on to say something like 'You're not going out dressed like that, young lady!'
I made the shirt a size up from my actual size because I wanted it to be quite drapey, and though it's perhaps slightly too large at the shoulders, it's good enough for me and I love the way it hangs. It looks nice buttoned up (I think that in the photos I left the top one or two buttons undone) and it looks nice hanging open like a jacket (which I don't have photos of). I used snaps instead of buttons to keep it simple, and in hindsight they are quite heavy and though they don't drag down the blouse too much, I might look for plastic snaps (these ones are metal) if I were to make this blouse again.
Sleeve cuff
I sewed a very thin hem on this blouse, though I was very intrigued by this article for Threads magazine and I think I'd try this method out next time.
Narrow hem
I really recommend trying out chiffon if it's something you've been thinking about, and I know I'm keen already to make another blouse like this, perhaps in a solid navy or black chiffon. If you've worked with chiffon before and have any more tips of tricks to add, there are many of us who would really appreciate it.


SHARE:

More sewing chiffon

SO, my sewing with chiffon continues...I'm sewing the button-down blouse pattern by burdastyle. A great little blouse pattern in my opinion, though as with many of the burdastyle magazine patterns, the instructions are fairly minimal so you kind of have to know what you're doing. Even so, this pattern isn't hard at all.

I started with the bust darts and was concerned about being able to see the dart fold through the sheer fabric so wondered if it's possible to French seam a dart, and you know what, it is. A blog I have enjoyed reading for some time, which is written by a professional pattern maker and seamstress called Buzzybeesworld, has some fantastic tutorials and couture sewing tips, and she has a tutorial on sewing a dart with a French seam.

This is probably not the best photo in the world of a French seamed dart, mainly because by its nature, there's not much to see. Which is a good thing, right?


This blouse has neckband sewn first onto the wrong side of the fabric, then flipped over to the right side, the raw edge folded under and top stitched down. I found it helpful to baste around the folded edge of the neckline before tucking under the raw edge and topstitching. The chiffon is so springy and two layers together seem to rub against each other and send you off sewing down different directions than the one you intended to follow, and the basting helped. I wondered whether the basting stitches would mark the fabirc or leave holes in the chiffon once removed, but they did not.


When it came to sewing the long seams (the blouse side seams and the sleeve seams) I found that again my fabric started to twist and it was much more noticeable on these longer seams. Still with my tape on the throat plate of my machine, I also added a layer of tissue paper behind the chiffon when sewing, and this helped tremendously.

In this photo below of the two sleeve seams, the top sleeve seam is twisted and does not lay flat but the bottom sleeve is sewn with the tissue paper behind it, and it is much flatter, straight and smooth. I'm hoping the difference won't be noticeable once I'm wearing the thing, because I just left the twisted sleeve like that...


Removing the tissue paper is easy because it has already been perforated by the needle. Just tear off a strip one side of the stitching, and the remaining side will just pull away cleanly.


Not satisfied with the results I got when following the pattern directions for sewing the sleeve placket, I used Sherry's tutorial for a continuous bound sleeve placket and it was a much tidier and neater result. Other than that, it was all surprisingly straightforward.

The blouse is all finished now. I just need to take some photos and I'll share it with you.
SHARE:

Starting to sew the chiffon

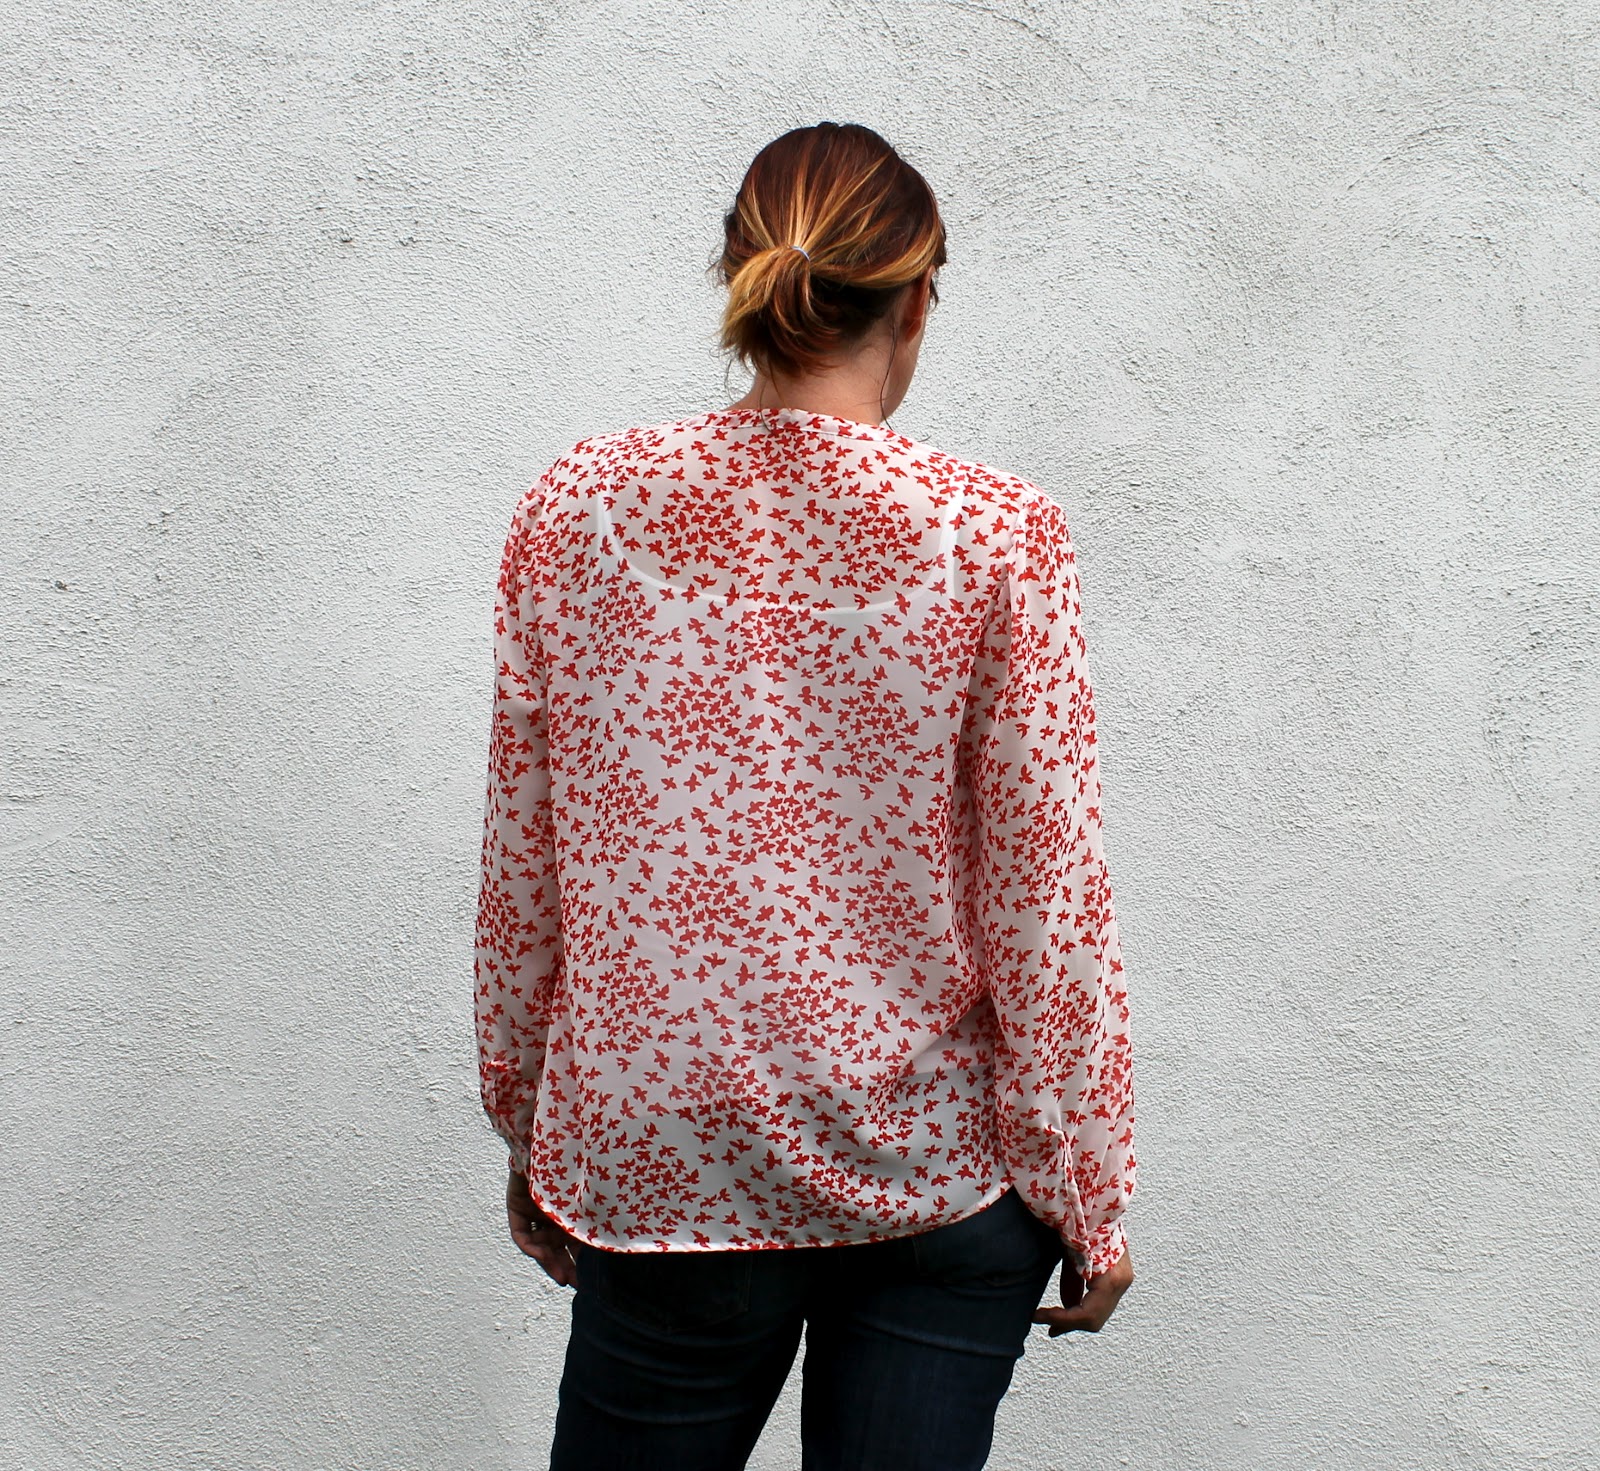
Yesterday I wrote about having bought some chiffon and shared a few cutting techniques that I found in various sewing books and online. Last night I actually started sewing it and I learnt a few things along the way, which I also thought I'd share.

Before putting my pattern pieces anywhere near the machine, I used a piece of scrap chiffon to try out a few different ways to sew. I started by lowering my machine into its table, which I think is something that quilters often do (?) I'd never done this before, despite having this amazing (second hand) sewing cabinet that I totally love.


Lowering the machine to the level of the table around it means that none of the fabric is pulling downwards and creating unevenness or stretching. Perhaps if you don't have a sewing table that does this, it might be worth trimming up some poster board to fit around the machine and propping it up so that you create your own flat sewing surface.


The next thing I did was to use a brand new needle - imperative to prevent the fabric snagging and pulling.


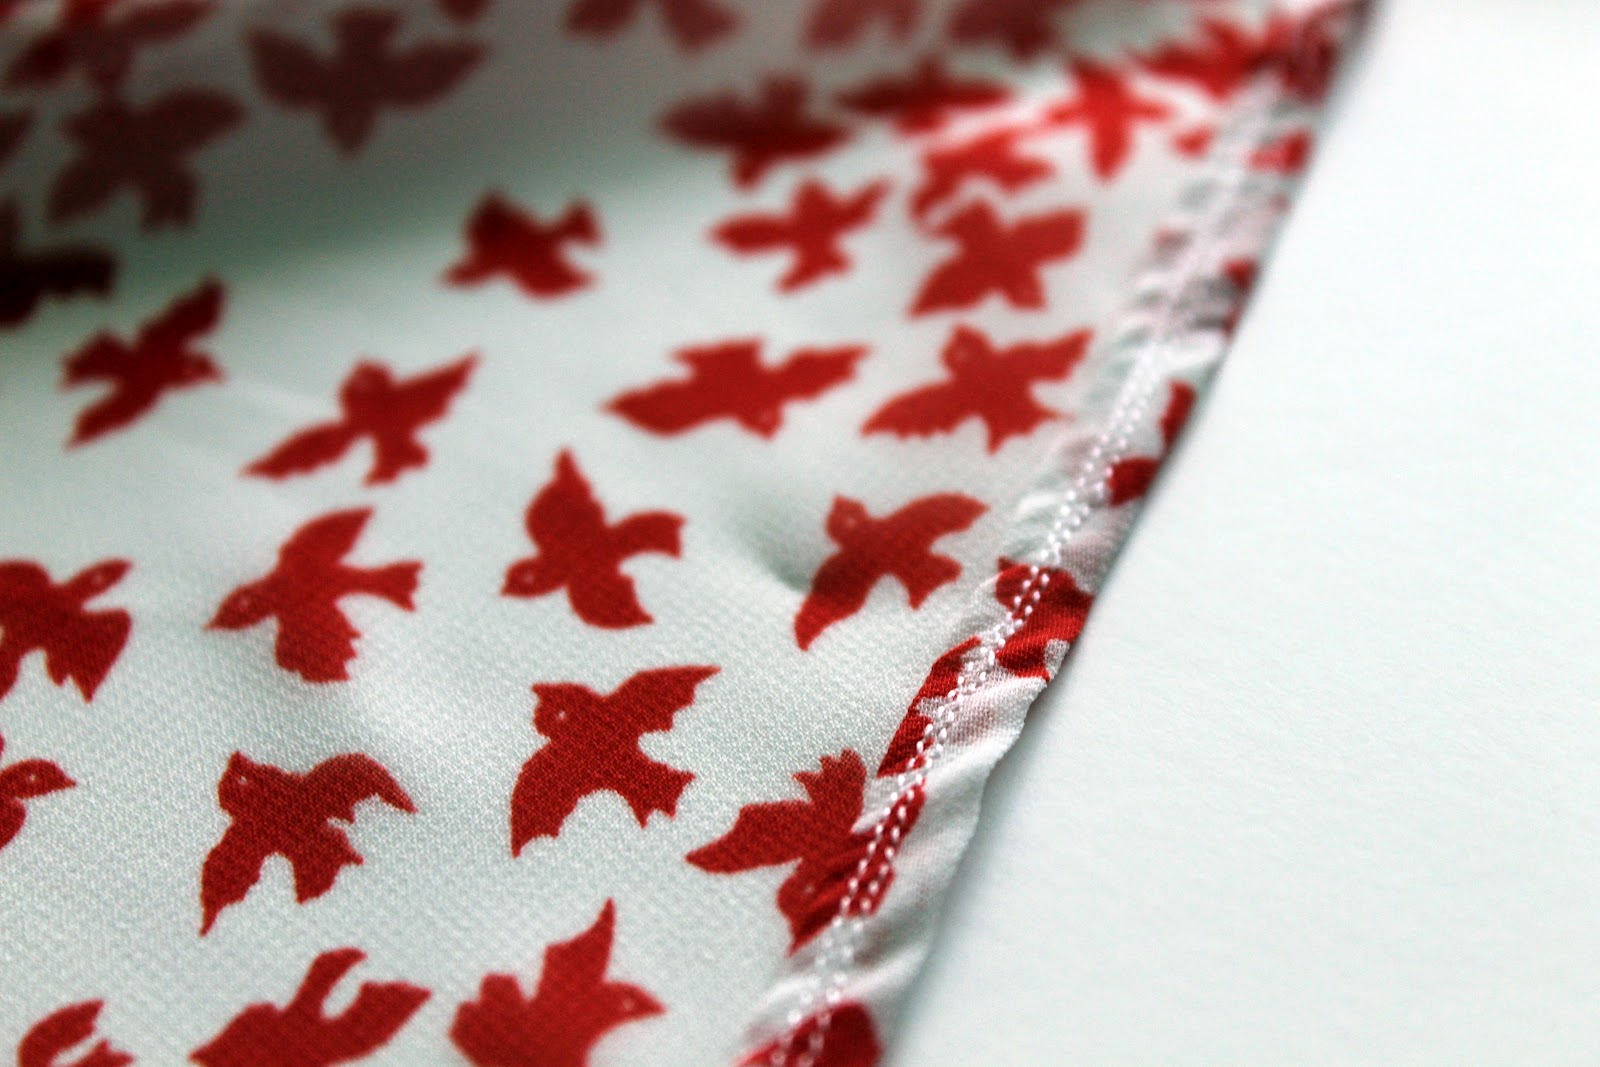
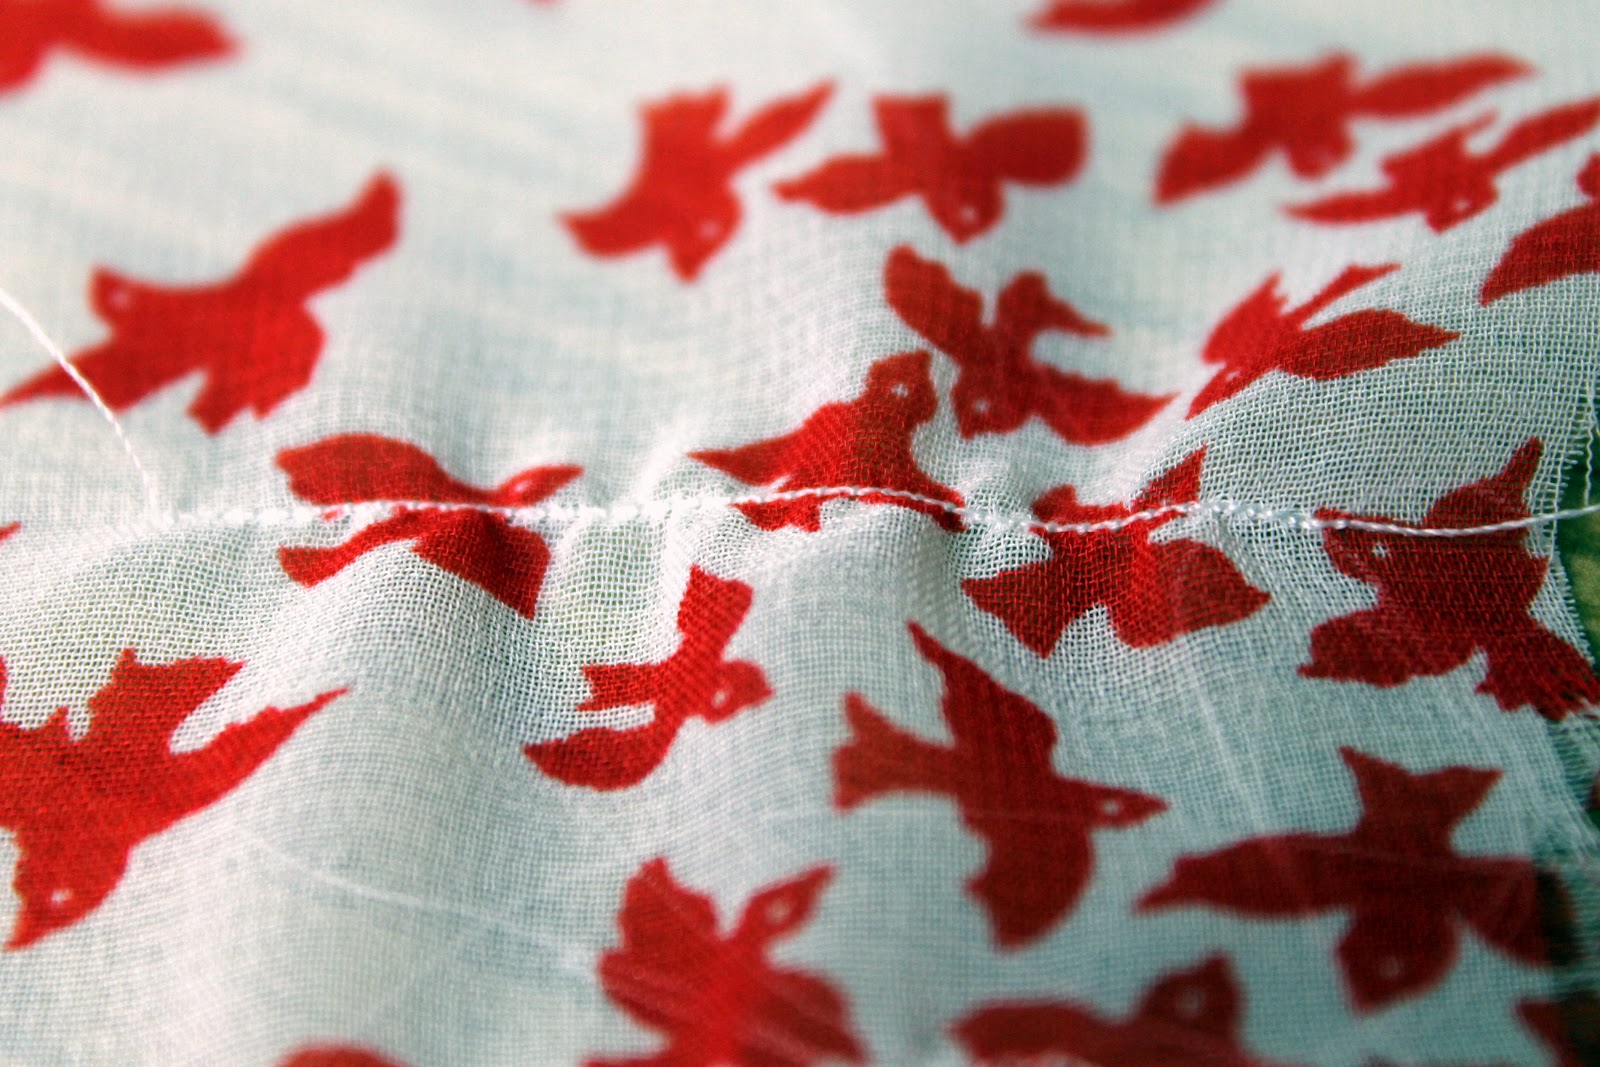
The stitching in the photo below shows what the sewing looks like if I do nothing more than put the fabric through the machine. It's puckered and tight and you can easily see that it's not a nice flat row of stitching.


I read that sewing with a layer of tissue paper on the back of the fabric works well, so I tried that out. It gave me a beautiful straight and even row of stitching (compare the photo below to the one above).


You sew right through the fabric AND the tissue paper. Though the tissue paper looks rumpled in the photo below, the stitches were pretty perfect. You simply tear off the tissue paper when you're finished sewing the seam. Pretty simple and effective.


The last thing I tried (which, if it worked, would mean I wouldn't being using up so much tissue paper) was to remove the throat plate of the machine and (avoiding the holes for the feed dogs) put tape on the top and bottom of the space where the needle goes through.


Black tape this time. I couldn't find my husband's green tape in the garage last night. Perhaps he has hidden it from me? Or maybe I didn't put it back from when I used it before....

Anyway, there's a small strip of tape on the bottom of the throat plate too. I returned the throat plate to its place on the machine and let my needle pierce a hole through the tape and pulled up the bobbin thread through the tape.


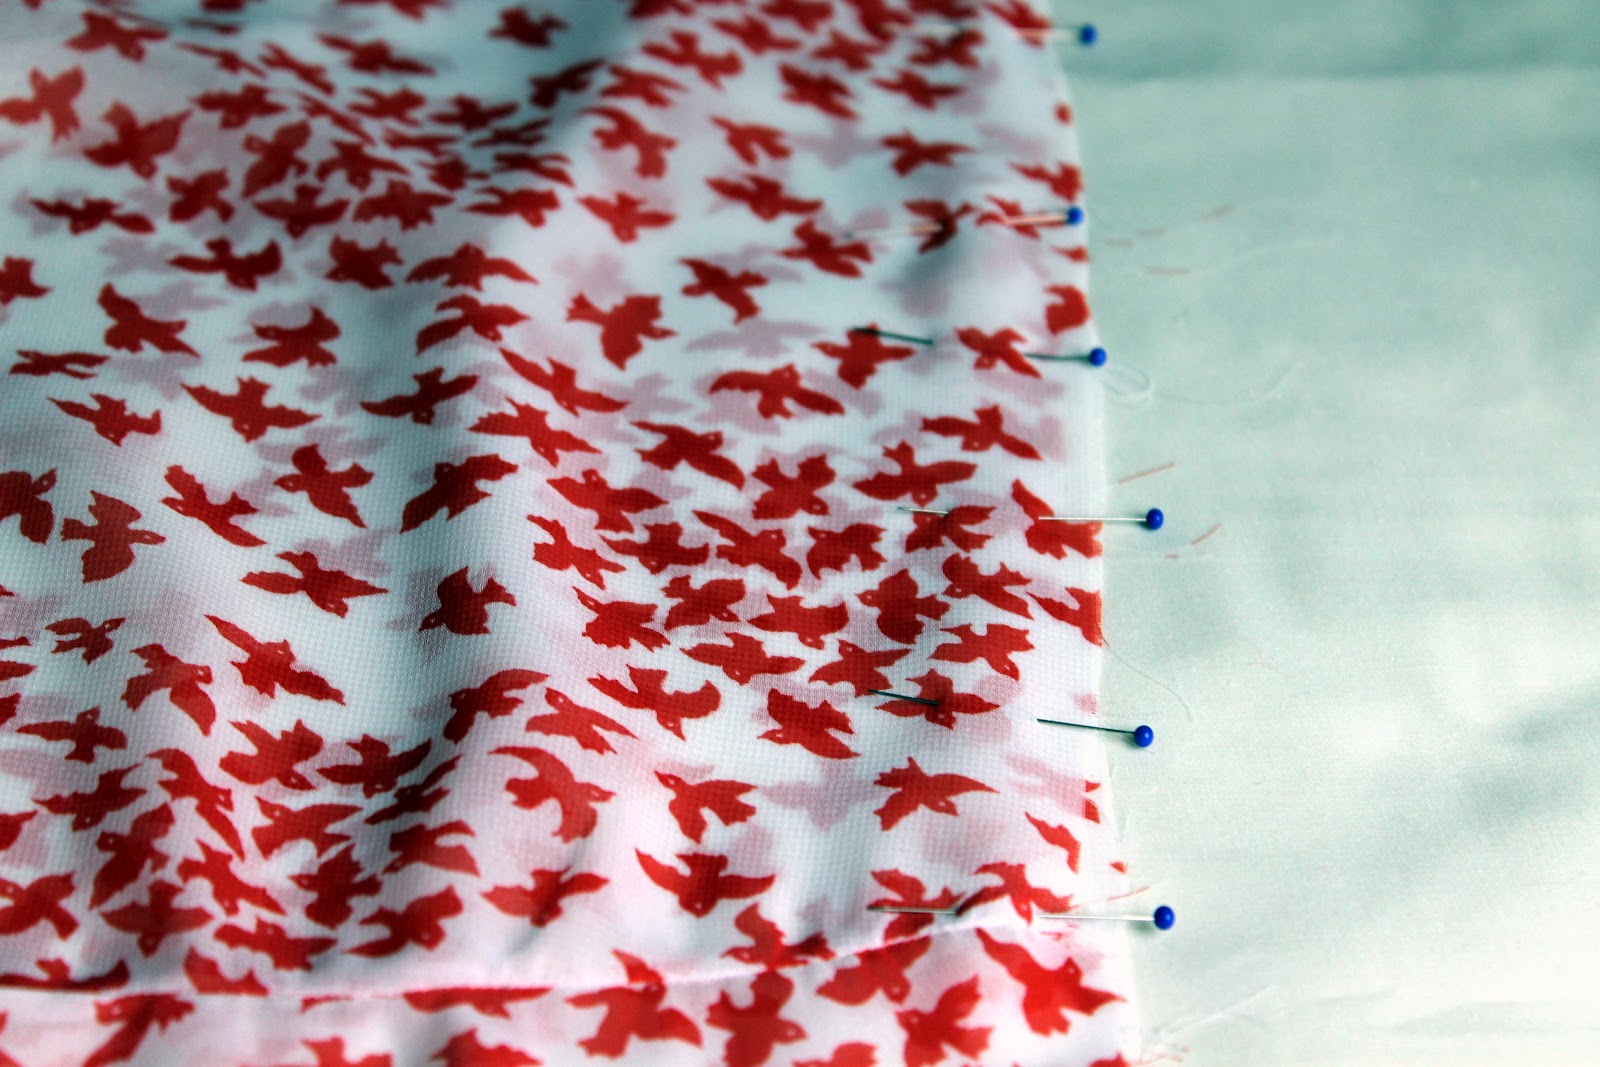
This technique stops the fabric from getting pulled and caught in the large gap the needle goes through. The photo below shows the nice even stitching I got using this method. I was happy enough with this outcome, so I ditched the tissue paper and started sewing my pieces together this way.


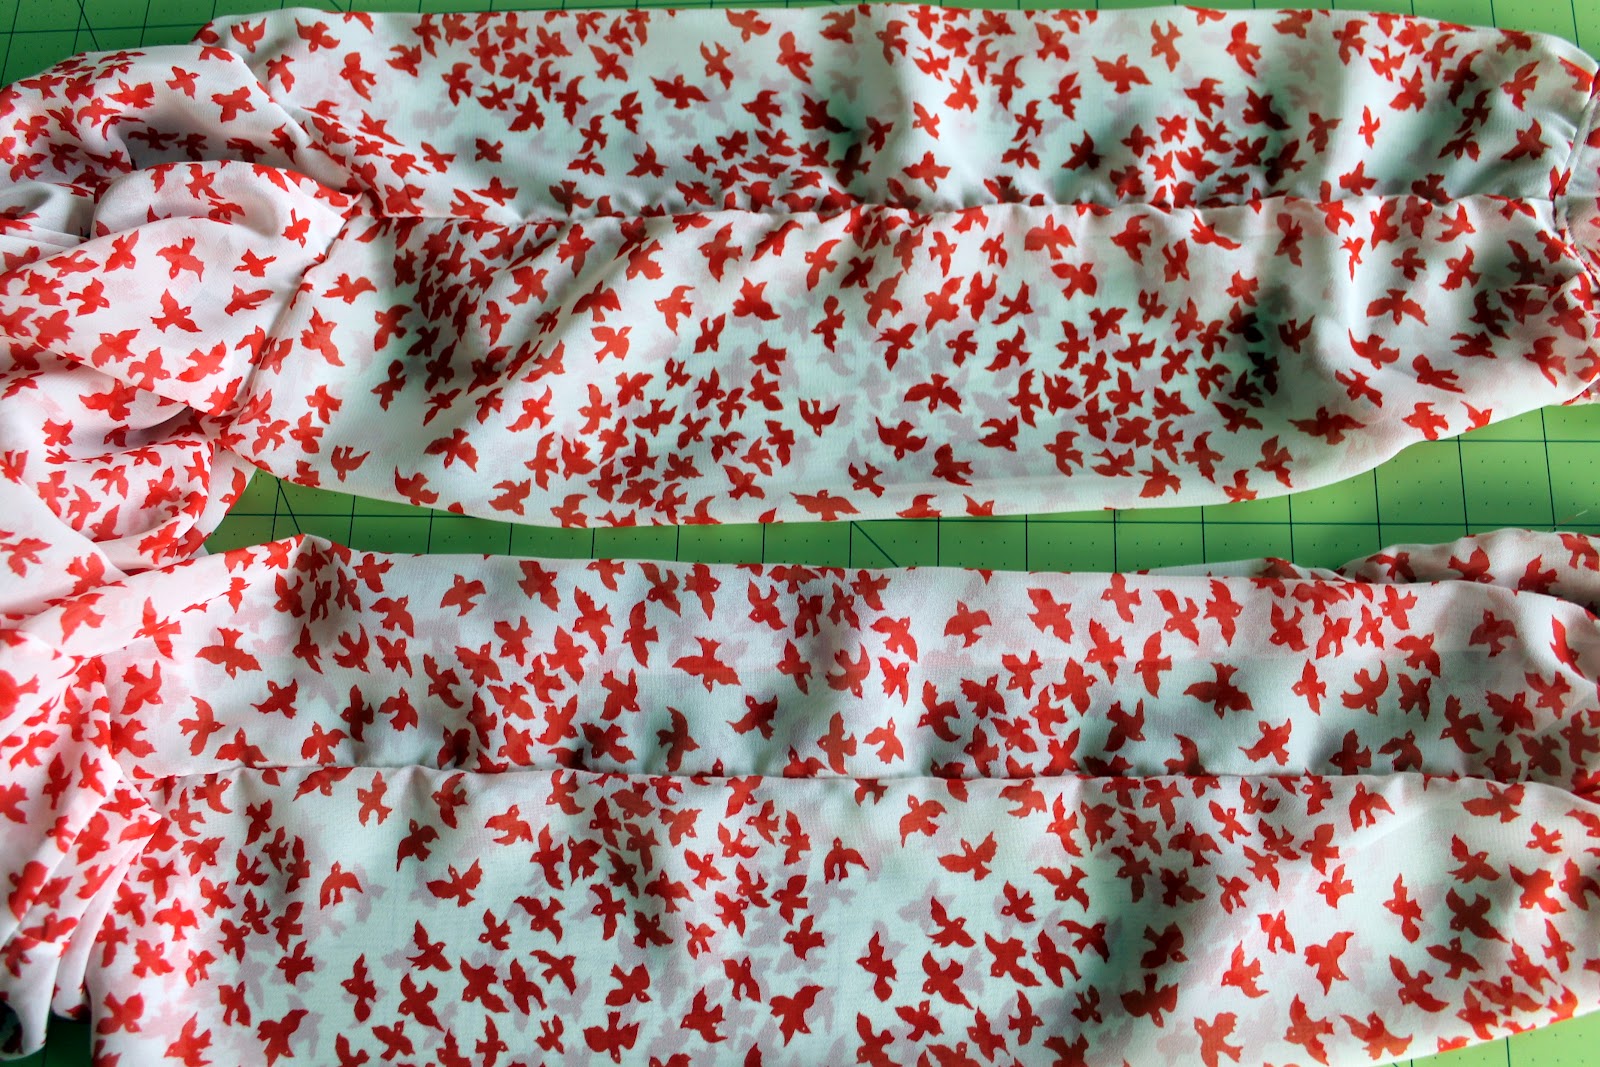
Once last thing, I laid out of length of cotton fabric on my table and used that as my work surface when laying out the pattern pieces. The chiffon moves around so much less on the cotton than on the cutting mat, which makes it so much easier to line up pieces and pin evenly.


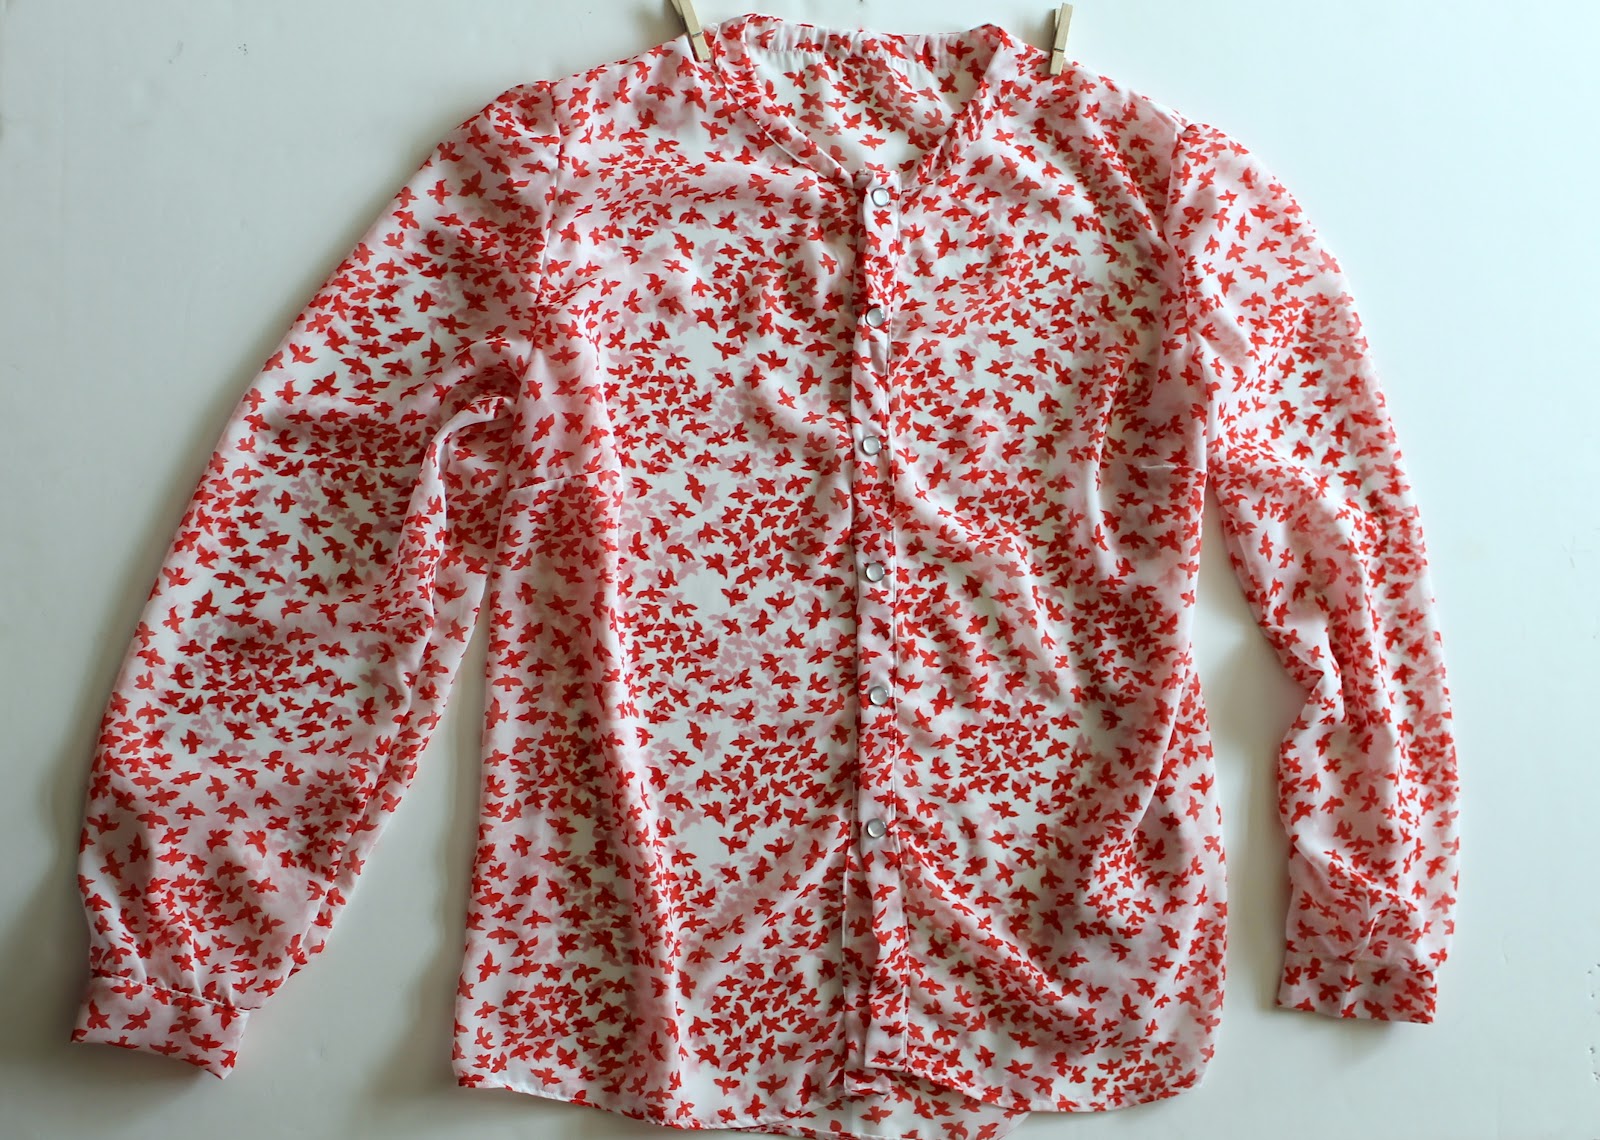
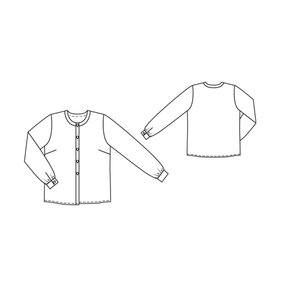
I'm making a blouse. Hopefully it'll be wearable after all this. We'll see. I'll give you a progress report tomorrow. It's definitely not something that can be rushed so, as usual, it's a good lesson in patience and trying to do something properly.
SHARE:

I'm still here and I have chiffon

I went to the fabric store yesterday and coming home with armfuls of yardage always makes me feel creative. I don't know what I may be letting myself in for with this chiffon I bought though. I immediately loved the design - white background with red birds - and at about $2 a yard, it was worth buying a couple yards and experimenting.

I spent last night reading what I could find about sewing with chiffon and I found some useful tips, which I thought I'd share, in case anyone else is brave (or crazy?) enough to try sewing such sheer fabric.

* You don't want to double up your fabric when cutting out your pattern because the chiffon is so lightweight it will shift causing you to have very wiggly lines. Any pattern pieces that require you to place them on the fold, I recommend you retracing the pattern piece so that you get both halves and taping them together. (Like my green tape pilfered from my hasband's tool box?)


* I have a lovely cutting table in my sewing room where I usually do all my crafting, but for cutting out the chiffon, I decided to cut it all on the kitchen floor instead. Lengths of yardage hanging over the edge of a cutting table will pull the chiffon making it stretch and skew. Being on the floor, means that none of the fabric is pulling in different directions and will help you get much straighter lines.

* I use pattern weights in general for cutting fabric and I found them especially useful in helping me to stop the fabric shifting around so much when lining up my pattern piece. If you are using pins, you should use the finest, sharpest ones you have (if your pins are anything like mine, you may need to buy a new set).


* Place a piece of tissue paper (the stuff you use in gift bags) underneath your fabric and cut through the fabric AND the tissue paper, when you cut. The tissue paper will act as a stabilizer and again, help you get straight lines. Don't underestimate how much this fabric moves - I don't know much about chemical elements but this stuff is so fluid, it's almost a liquid.


* Whether you use shears or a rotary cutter to cut out your pattern, make sure the blades are sharp. Any snagging will cause the chiffon to shift and pull out of place.

Ok, that's probably enough procrastination. I haven't even put this fabric anywhere near my sewing machine yet. You can probably tell I'm trying to put that moment off.

Do you have any tips for working with chiffon to share?
SHARE:
© The Hello Beautiful Blog | All rights reserved.
Blogger Template Created by pipdig