Busy hands

I have been doing more handsewing than usual lately and I was so happy to come across this magnetic needle box in Joanns this week. I am waaaaaay too easily pleased.

I have been using a doll needle, which is far too long to fit in the magnetic needle box (sigh).

What have I been making, you ask? Well, it's not finished yet (my deadline is Wednesday ~ my daughter's 5th birthday) but here's a clue....

Stay tuned for the finished thing....
SHARE:

Wool felt circle coasters

I think hand sewing wool felt is one of my favorite things to do and trying to think up ways to use up my small bits of leftover felt is always fun. I used a Fiskars circle template given to me a while back. I use it for almost every project ~ no more drawing around plates, bowls or jars to find the right sized circle!


SHARE:

Crochet

I go through phases of really enjoying crocheting (usually in the cooler months) and recently I have been wanting to start a project, but I think it's going to have to wait until the kids are back in school. Not that I can't browse for patterns right now. I most often get patterns from crochetpatterncentral.com for free or purchase ones from etsy. After a quick browse through the crochetpatterncentral website (which is a GREAT resource but pretty tedious to click through) these are some of my favorite finds.

Legwarmers

Cardigan


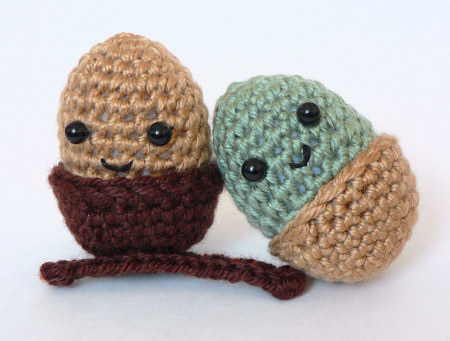
Acorn amigurumi

And here are some of my etsy favorites...
I want an orange crochet octopus in my life

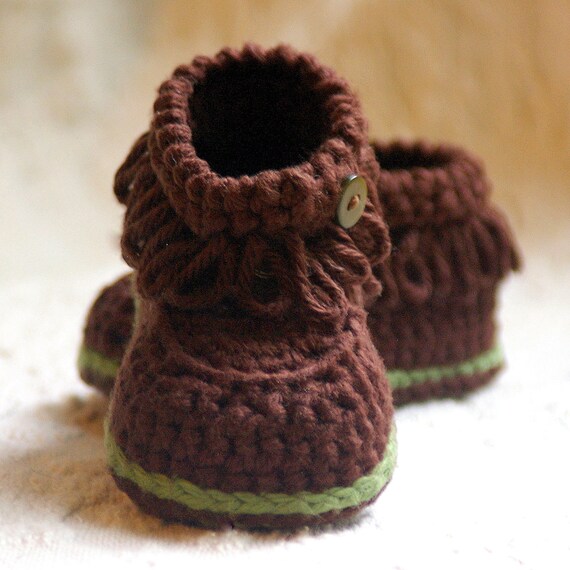
Awwww - baby boots!


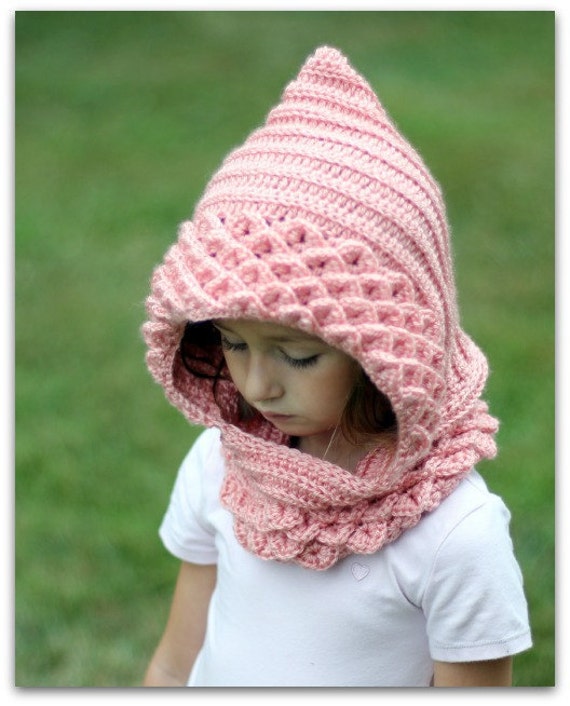
This hood is JUST my daughter's style

Ravelry.com is also a huge resource for patterns, though for some reason I often forget to look there.

I subscribe to Crochet Today but I have never made anything from it. I don't know if it's the colors they use, or the styles, but I'm not really drawn to their patterns. Anyone else feel like this? Care to share some crochet pattern resources??
SHARE:

Time flies when you're having fun

Phew! I'm trying not to think it, but a little voice somewhere in the back of my head is whispering that the summer vacation is almost over and there's only 3 weeks left until the kids go back to school! I'm not sure how it happened, but we're more than half way through August already. I heard an interesting theory the other day about why time seems to go by much quicker the older you get. When you are 4 or 7 (like my kids happen to be), 1 year is 1/4 of your life, or 1/7th. A whole quarter of your life seems like such a long time, right? It least it does when you're so small. When you get to be an old frump like me, 1 year is proportionally, a much small part of the many years you have lived, and in my case is only 1/34th of my life. Or maybe 1/33rd. If I wasn't so old, I'd be able to remember how long I've lived!

Anyhow, time certainly seems to go by quicker when you're having fun, there's no denying it. This summer we bought an RV (a really old one ~ nothing fancy, it's almost as old as I am but has so much style ~ just like me :O)
We've taken it on a few camping trips which have been a great success.

We've even got into the habit of driving it down to the beach at the end of our street and parking up for the evening. We have a play in the sand, fly kites if there's enough wind and get our feet wet. Then we head back to our van, cook some dinner, give the kids a shower, put their pajamas on and after reading them some bedtime stories, drive home to put them in bed!

I have also managed to find time to squeeze in a couple of sewing projects. I've been busy on some work for Fiskars and have made 2 amazing Halloween costumes that I am so excited about (luckily, so are the kids). They won't be published for some time yet, but I will be sure to let you know when they are.

I hope you are all enjoying your August. My little one turns 5 on the last day of this month. I noticed as I was helping her get dressed this morning, that many of her clothes are 3T. I think it may be time for me to finally admit that my littlest one is growing up. And needs bigger clothes.
SHARE:

Perfectly easy dress

I made this sweet dress for my 4yr old a while back from Burda 9564. It is super simple and really cute so I made another one and took photos along the way. If you are a beginner sewer and want a simple yet cute dress to make, try this one and let me help you out!

I made View B and used a stretch corduroy fabric. The other one I made was a jersey. If you are a beginner, I recommend using something without too much stretch in it.

Cut out all pattern pieces in the correct size, pin to the fabric and cut out.

I use tailor's tacks to make my markings whilst other people prefer to transfer pattern markings using chalk or a washable marker. (I have to admit I don't always transfer pattern markings because I'm impatient, but things always come out better when I do, so it's good to get into the habit of doing it).

To make tailor's tacks, baste large loose stitches through the pattern marking and both pieces of fabric underneath.

Open up the fabric and cut the stitches in the center.

Pattern step 1 ~ pin the pleats down to the pleat line. You are folding the pleats inwards and into the center of the wrong side. When you have stitched up the pleats, make sure you iron them flat. Ironing your sewing will always give you a more professional looking finish.

Pattern step 2 ~ Put the back pieces with right sides together. Baste the center seam until you get to the marked line, then use a regular stitch. In this photo, I basted the center seam through the yellow pins and changed to a seam stitch for the white pins down.

Here you can see where my stitch changes.

Iron the seam open.


Snip the basting stitches all the way to where you changed stitch.

I serged the raw edges of this seam. You can also run a zig zag stitch down each side. This will stop it fraying.

Put the front dress piece onto the back with the right sides facing and pin at the shoulder seams. Stitch in place and finish the raw edges with a serger or zig zag stitch.

Pattern step 3 ~ fold your bias strip in half along the length and iron. Pin around the neckline with the raw edges matching.

Stitch, then trim the raw edges shorter, without cutting into your stitching.

Pattern step 4 ~ fold the bias strip over to the inside, pin and stitch in place.

Press the neckline so it looks flat like this.

Pattern step 5 ~ insert the invisible zipper into the back seam. This video tutorial explains really clearly how to put in an invisible zipper. It is very easy to do, once you get the hang of it. Don't be scared ~ try it!

Sew the side seams of the dress together.

Again, I finished the edges with the serger. You can also zig zag stitch.

Pattern step 6 ~ to hem my dress I went around the bottom with the serger, then pressed the seam up to the inside then went around the bottom with a straight stitch.

Pattern step 7 ~ You are now going to work on the sleeves. Baste 2 rows of stitches between the pattern markings. Next, hem the sleeves in the same way as you hemmed the bottom of the dress.

Where I serged the seams, you can also run a zig zag stitch along the edge, press to the inside with the iron and stitch with a straight stitch.

Pattern step 10 ~ Fold the sleeves in half length ways with the right sides facing in. Pin then stitch this seam.

Pattern step 11 ~ Turn the dress inside out. Turn the sleeve the right way out. Insert the sleeve into the armhole and pin together at the underarm seams, making sure the seams align. Match the pattern markings and gather the sleeve to fit the armhole by pulling on the bobbin threads of the basting stitches. This will gather up the fabric so that it will fit into the armhole. Make sure your gathers are even between the pattern markings.

Stitch all the way around and finish the seam allowances by trimming it and finishing with a serged edge or a zig zag stitch.

Sew the buttons onto the marked points. I only wanted 2 buttons on this dress instead of the 4 the pattern suggests. My mother in law gave me a bundle of these gorgeous ceramic buttons a while back for my birthday and I'm excited to have found a place to use a couple of them. Aren't they lovely?!

And there you go. If your model is slightly more compliant than mine, you may get a better photo than me! It's a cute and very easy dress. I hope I may have helped some of you make it.


SHARE:

Back to school legwarmers

Did I say back to school?? I'm really not ready to think about my children going back to school just yet because I am really loving having them home and to myself. However, I do always look for good excuses to make things for them and so I came up with these funky leg warmers from a pair of long women's socks. My daughter loves wearing these, so I've made several pairs. You can check out my tutorial over at Fiskars.

SHARE:

Cat backpack tutorial

A few weeks ago, Jessica from MeSewCrazy kindly featured my cat backpack tutorial. In case you missed it, here it is!


I was asked to make a back pack for a friend's daughter who will be starting kindergarten in September. There were no special requirements other than it be able to carry school files and a lunch bag. Oh, and that it had a cat on it.

I spent a LONG time looking at my kids' own (store bought) back packs, looking at pictures online and scrutinizing pattern envelopes. I have some experience in making bags for my etsy store but I had never attempted a back pack before (and I don't think I've ever sewn a cat before either) but I'm always keen to give something new a go and I like a challenge.

In the end I came up with my own version based on some of the ideas I liked best from my research. I like this design because it is endlessly customizable (I don't think that's a word?!?!?) and though I have taken MANY photos for this tutorial, it's pretty straightforward and simple. Honest.

I will tell you the precise measurements for each pattern piece as I work through the tutorial, but you should know that you need roughly 2 yards of main fabric and about 1 yard of fabric for your lining. I also used a small piece of a 3rd fabric for the flap. I added an insert between the outer and the lining to give it body, shape and protection (which sounds like an ad for shampoo). I used felt (because I had some to use up) but you could also use quilt batting or fleece.

Finally, you will need some bag hardware; 2 loops and 2 sliders, both measuring 1.5" and some cord for the drawstring.

1. Cut front pocket pieces. 2 pieces of main fabric and 1 piece of felt 8.5" x 10.5".
2. Sew the main fabrics right sides together, with the felt on the back but leave the bottom seam open for turning.
3. Clip corners and turn right side out.
4. Top stitch along the top edge of the pocket.

5. Cut 2 pieces of main fabric (I changed color here for contrast) 13.5" x 16.5".
6. Pin and sew the sides of the pocket piece to the center of one of these pieces. This is the front of your bag.
7. Back stitch at the top edges for reinforcement.
8. Your pocket is now sewn to the front of your bag.

We are now working on the handle, straps and loops for your bag. For the handle you will need 1 piece of fabric 5.5" x 11". For the straps 2 pieces of fabric 6" x 20". For the loops 2 pieces of fabric 6" x 20".
9. On all pieces, iron in half down the length. Open up and iron edges into the center.
10. Fold one half over and iron.
11. Top stitch along the long edges.
12. Repeat for all pieces for the handle, straps and loops.

13. Thread your loop pieces onto metal bag loop, fold in half and pin ends 4" from the sides of the bottom of the back of your bag.
14. Repeat for both sides.

15. Take your strap piece and thread over the center bar of your slider and stitch in place.
16. Take the long end of this same piece and thread it through the loop on the bottom of your bag.
17. Bring that end up through the slider from underneath.
18. And thread it back behind the other side.

19. Bring the strap end all the way to the top edge of the bag and stitch. Pin, then stitch your bag handle to the center. YOUR BAG STRAPS NEED TO BE CLOSER TOGETHER THAN THEY ARE IN THIS PICTURE, I HAD TO UNSTITCH AND MOVE THEM. PUT YOUR STRAPS RIGHT NEXT TO THE HANDLE WITH NO SPACE IN BETWEEN!

Cut 2 strips of fabric 2.5" x 16"5 " for the bottom edge detail.
20. Pin 1 strip along the bottom edge of the front of your bag, covering the untidy bottom part of the pocket.
21. Fold back and press.
22. Pin second strip onto bottom of bag back and stitch. Make sure you catch all the ends of the loops. Go back and forth over the loops a few times for reinforcement.
23. Again, fold back and press.

24. Put your bag front and your bag back right sides together.
25. Stitch down each side only. Not along the bottom. I like to reinforce my stitching with a zip zag inside the seam.
26. Cut bag base piece 7" x 11" (I made sure this was the darker fabric since it's likely to get dirty because it'll be the part touching the floor)
27. Pin the base into the bottom of the bag. Line up the side seams with the center of the short sides of the base. Use lots of pins to get it right.

You then need to make a felt insert and a lining. For the lining, you need 2 pieces 15.5" x 16.5". Sew down the long sides, leaving the top open. Add a bag base piece 7" x 11" and pin the sew to the bottom (28). Make the felt insert in the same way with the same measurements.

Now it's time to work on the flap.
29. Cut 2 pieces of fabric and 1 piece of felt 9.5" x 14". I rounded off the corners at the bottom.
30. I knew I wanted a cat face on the flap (at the little girl's request) so I experimented using a plate as a template.
31. I cut out a cardboard circle and tried out some ideas on that before committing to cutting up fabric and once I was happy with my design I stitched it all up. Experiment with different animals here. I made it up as I went along and there's no shortage of ideas and inspiration online.

33. I used a zig zag stitch to attach the eyes and a satin stitch to attach the face to the flap. I hand stitched the mouth and whiskers. The ears are separate triangles and are flaps which stand out from the bag. They are my favorite part! Sew your flap pieces together in the same order that you sewed the front pocket, turn the right way out, press and top stitch around the edge.

34. Turn your main bag right way out and push in your felt insert and the lining. Baste around the top edge of all 3 bag pieces then pin your flap to the back center and baste again. Make sure your flap covers the straps and handle ends.

This is honestly the last step! Are you still with me??
36. Make a casing for the draw string cord by cutting 2 pieces of fabric 2 1/4" x 17 1/2".
37. Pin then stitch one short end together to make one long strip.
38. Press in the 2 short ends and 1/4" along one long edge.
39. Pin the non-ironed edge all the way around the top of the bag making sure the 2 ends are front center.

40. I actually inserted my drawstring cord at this point and just kept it out of the way when sewing. I am NOT patient and cannot bring myself to spend hours threading cord through a casing and getting nowhere slowly.
41. Fold the pressed edge over the top of the bag (and in my case, also over the cord ~ though you can't see it in the photo).
42. Pin the casing to the back and then stitch all the way around the bottom of the casing so that the cord is inside its own long tube.
43. Tie knots to the ends of your cords. You don't want them disappearing into the casing ~ ever!

And phew! YOU ARE DONE! I personalized mine by adding my own label and a name tag for the bag's owner. I think it makes a nice touch and adds to its one of a kind-ness.


SHARE:
© The Hello Beautiful Blog | All rights reserved.
Blogger Template Created by pipdig